 Save
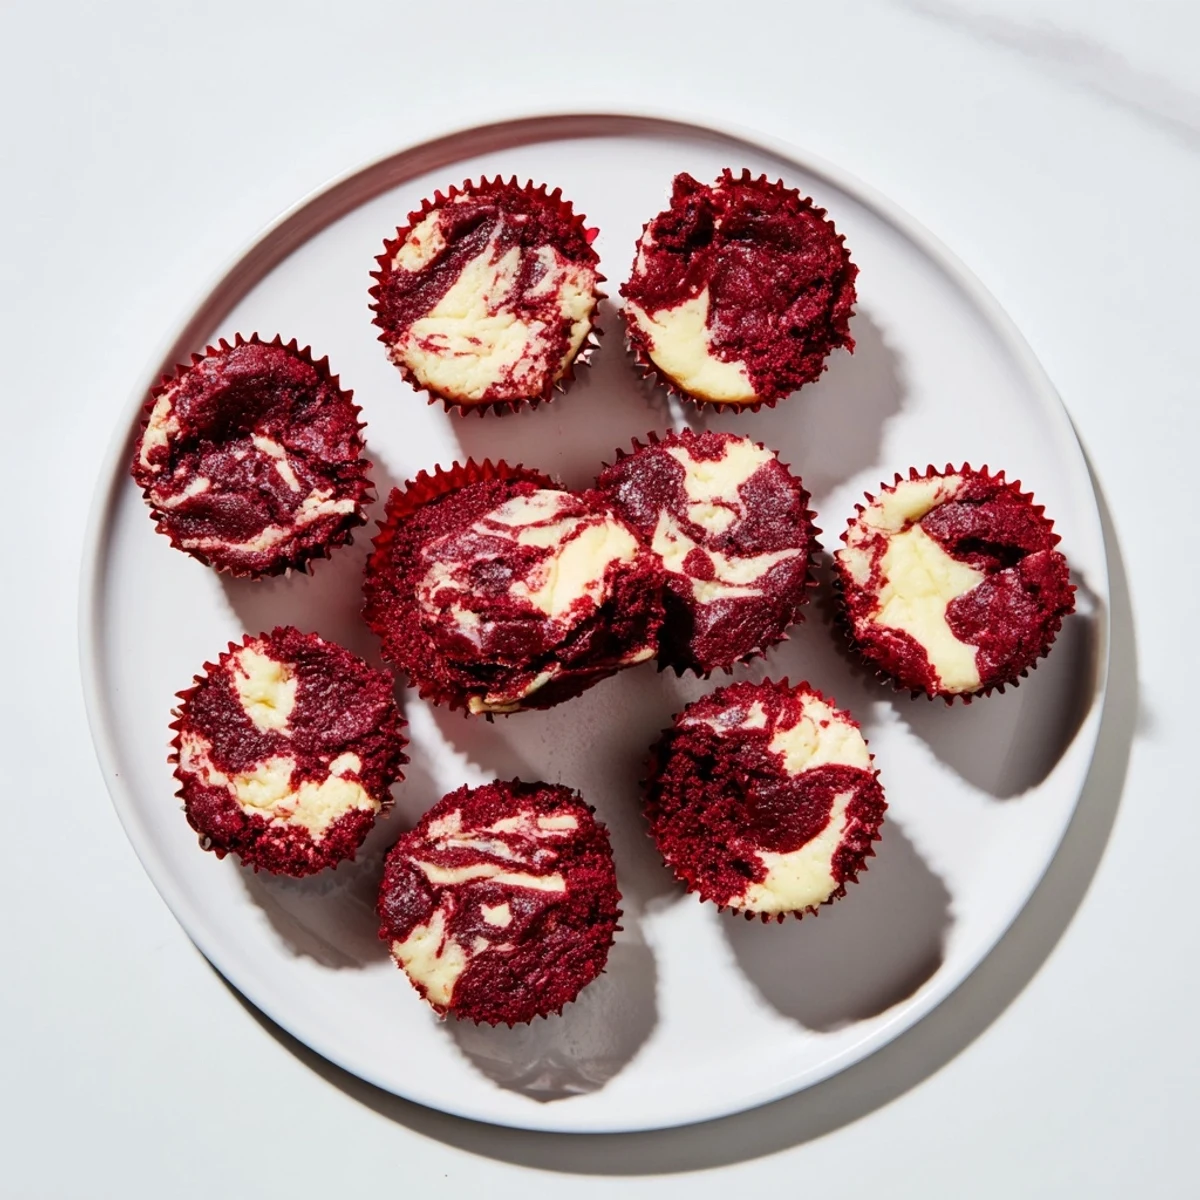
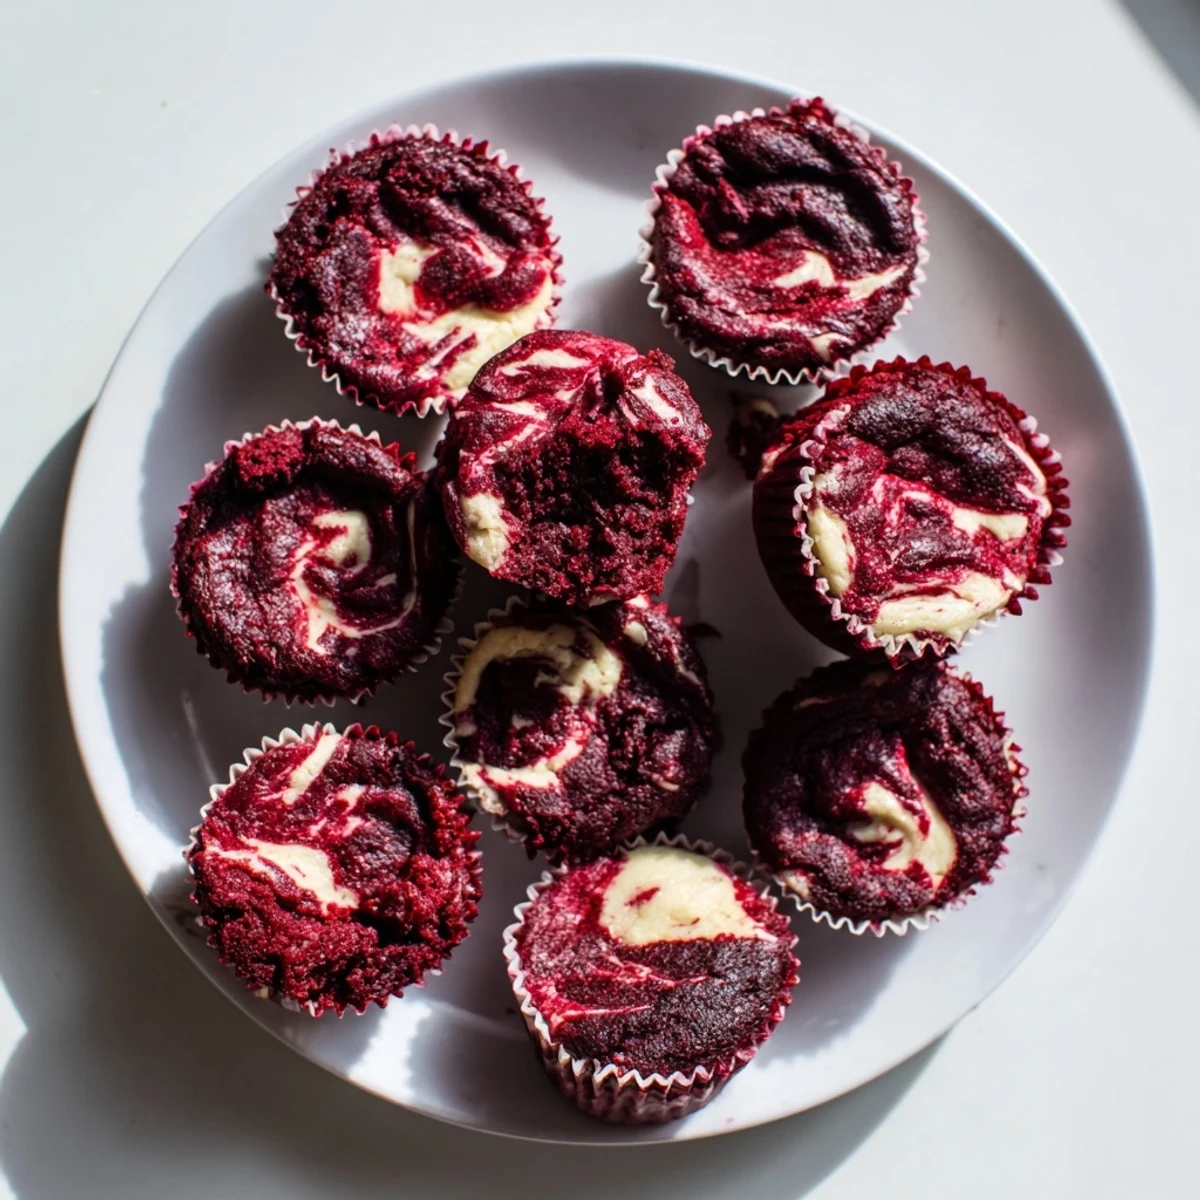
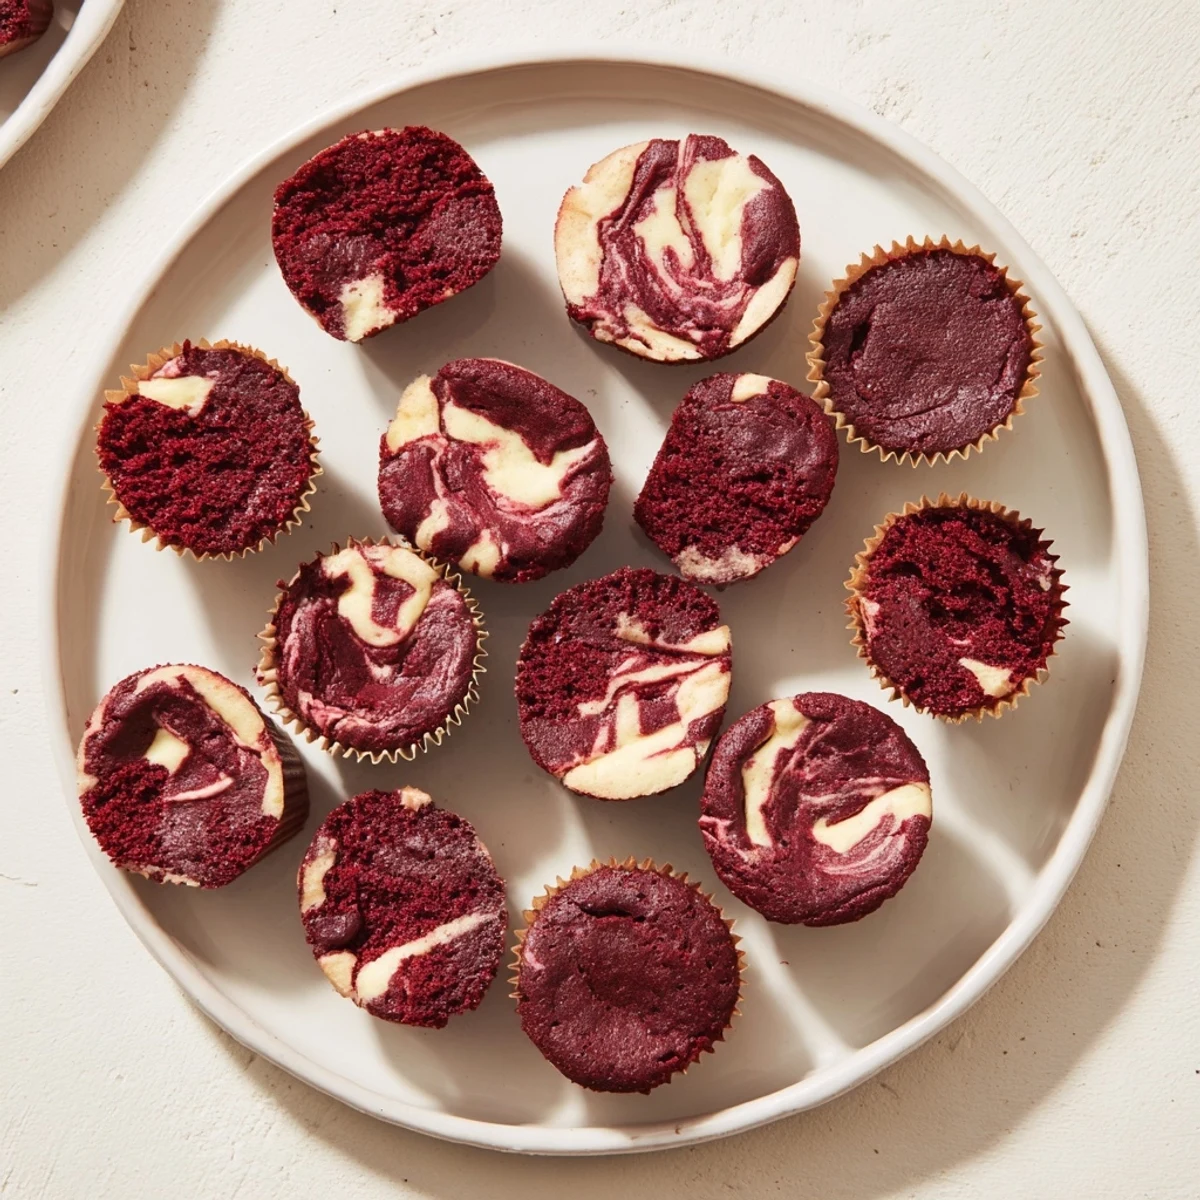
Save These irresistible red velvet brownie bites combine the classic flavors of red velvet with a rich, fudgy brownie texture. Each mini treat features a beautiful marbled cream cheese swirl that adds tangy sweetness and visual appeal. Ready in just 45 minutes, these bite-sized desserts are ideal for entertaining, holiday platters, or whenever you want something special.
The brownie base is incredibly moist and tender, with just the right balance of chocolate and vanilla. The cream cheese swirl bakes into a slightly tangy, creamy layer that perfectly complements the deep red cocoa base. Plus, the mini muffin format means built-in portion control and easy serving—no cutting required!
My sister brought these to a holiday party last December, and I literally followed her around the dessert table until she agreed to share the recipe. The striking red and white marbled pattern stopped everyone in their tracks, but one bite had people genuinely moaning into their napkins. Now they are my go to when I need something that looks impressive but comes together with zero stress.
I made these for my book club and watched three grown women crowd around the platter discussing proper swirling technique. Something about that red velvet color makes everything feel festive, even on a random Tuesday. One friend actually hid two in her purse to take home.
Ingredients
- Unsalted butter: Melt it gently so it is warm but not hot when you mix it in
- Granulated sugar: Cream this thoroughly into the butter for that crackly top we love
- Large egg: Room temperature eggs incorporate better and give you that fudgy texture
- Vanilla extract: Do not skimp here since it bridges the chocolate and cream cheese flavors
- Red food coloring: Gel coloring gives you that vibrant ruby red without adding extra liquid
- All purpose flour: Measure by weight if you can for consistent results every time
- Unsweetened cocoa powder: Sift it to avoid any stubborn lumps in your batter
- Salt: This tiny amount wakes up all the chocolate flavors
- Cream cheese: Really let it soften so your swirl mixture is silky smooth
- Egg yolk: This enriches the swirl and helps it hold its shape while baking
Instructions
- Prep your pan and oven:
- Get that oven preheating to 350°F and line your mini muffin tin while everything comes to room temperature
- Make the red velvet batter:
- Whisk that melted butter and sugar until it looks glossy, then beat in your egg, vanilla, and that shocking red coloring until combined
- Add the dry ingredients:
- Fold in the sifted flour, cocoa, and salt until just combined, because overmixing makes tough brownies
- Prepare the creamy swirl:
- Beat your softened cream cheese with sugar, egg yolk, and vanilla until it is smoother than a jazz record
- Layer the batters:
- Spoon a tablespoon of chocolate batter into each cup, then dollop a teaspoon of cream cheese mixture right on top
- Create the marble:
- Swirl gently with a toothpick, just two or three figure eights, because too much swirling muddies the pattern
- Bake to perfection:
- Slide them in for 23 to 25 minutes until the centers are set with those coveted moist crumbs on a toothpick
- Cool completely:
- Let them rest in the pan for 10 minutes before moving them to a wire rack, or the swirl might get sad and droopy
 Save
Save My neighbor texted me at 11 PM the night I first made these, saying she could smell them through our shared wall and was having dreams about red velvet. I brought over a dozen the next morning, and we stood on her porch eating them in the sunshine like it was the most normal way to start a Tuesday.
Getting the Perfect Swirl
I have learned that the most beautiful marbling happens when you do not overthink it. One gentle figure eight motion with your toothpick creates those elegant ribbon like patterns that look professionally done. Rushing or making too many passes turns everything into a muddy mess.
Storage Secrets
These actually taste better on day two when the flavors have had time to become best friends. I keep them in the refrigerator and pop one in the microwave for ten seconds before serving. That little warmth brings back the just baked texture and makes the cream cheese swoon worthy again.
Make Ahead Magic
You can bake these up to three days before your event and store them tightly covered in the refrigerator. The cream cheese swirl stays fresh and the brownie base becomes even more fudgy over time.
- Freeze undecorated brownies for up to a month
- Thaw frozen ones overnight in the refrigerator
- Bring to room temperature before serving for the best texture
 Save
Save There is something magical about cutting into that red and white marbled top and revealing the fudgy interior. These little bites have become my secret weapon for turning ordinary moments into tiny celebrations.
Recipe Q&A
- → Can I make these red velvet brownie bites ahead of time?
-
Yes! These brownie bites store beautifully in an airtight container in the refrigerator for up to 4 days. The flavors actually develop and become more pronounced after a day. You can also freeze them for up to 3 months—just thaw in the refrigerator overnight before serving.
- → Why did my brownie bites sink in the middle?
-
Sinking centers typically happen when the batter is underbaked or when too much cream cheese swirl is added. Make sure to bake until the centers are set and a toothpick comes out with just a few moist crumbs. Also, use only 1 teaspoon of cream cheese mixture per brownie bite to maintain structure.
- → Can I use natural food coloring instead of red dye?
-
Natural options like beet juice or pomegranate juice can work, though they'll produce a more muted, berry-toned red rather than the classic vibrant shade. Gel food coloring generally gives the most intense color with the least amount needed, which won't affect the batter consistency.
- → What's the best way to get a pretty marbled swirl?
-
The key is not to over-swirl! Gently drag a toothpick through the cream cheese topping just 2-3 times in a circular or zigzag motion. If you swirl too much, the colors will blend together and you'll lose the beautiful marbled effect. Work quickly before the cream cheese mixture warms up and becomes too thin.
- → Can I make these in a regular brownie pan instead?
-
Absolutely! Pour the batter into an 8x8 inch square pan and spread the cream cheese swirl over the top. Bake at 350°F for about 25-30 minutes, then cool completely before cutting into squares. You'll get approximately 16-20 regular-sized brownies instead of 24 mini bites.
- → How do I know when the brownie bites are done baking?
-
Insert a toothpick into the center of a brownie bite—it should come out with a few moist crumbs but not wet batter. The tops should be set and slightly firm to the touch. Remember that they'll continue to cook slightly as they cool in the pan, so it's better to slightly underbake than overbake for that fudgy texture.